Stable Diffusion on Azure N-Series (GPU) VMs
Install guide for a hassle free, cost effective and performance optimized deployment of AUTOMATIC’s 1111 Stable Diffusion web UI
Introduction
Following the huge interest in text to image generative AI, several software as a service offerings (based on diffusion technology) are now available to a wider audience. Choices range from the completely free Image Creator on the new Microsoft Bing, to services like Stable Diffusion by stability.ai, DALL-E by OpenAI and Midjourney.
After the announcement and public release of Stable Diffusion and building on the work of Open-Source community, running your own text to image generative AI is now an option. As with anything Open Source, there are numerous hardware and software combinations and opinionated views on how to achieve that goal.
This article will guide you to install one of the most popular environments, AUTOMATIC’s 11111 Stable Diffusion web UI, on an Azure GPU optimized virtual machine.
Before starting with the installation, a couple of words on picking a VM series, VM size, and relevant performance. Taking into consideration:
Upcoming retirement of older N-Series VMs and the relevant migration guide
Available N-Series virtual machines and existing options for NVIDIA GPUs (K80, P40, M60, P100, T4, V100, A10, A100)
Stable Diffusion’s GPU memory requirements of approximately 10 GB of VRAM to generate 512x512 images.
Pricing of virtual machines.
Stable Diffusion’s performance (measured in iterations per second) is mainly affected by GPU and not by CPU.
The clear winner in terms of price / performance is NCas_T4_v3 series, a new addition to the Azure GPU family, powered by Nvidia Tesla T4 GPU with 16 GB of video memory, starting with a 4-core vCPU option (AMD EPYC 7V12) and 28GB RAM.
These virtual machines are ideal for running standard GPU workloads, ML, AI, and GPU-accelerated graphics and visualization applications based around CUDA, TensorRT, Caffe, ONNX, TensorFlow, Pytorch, Caffe, OpenGL and DirectX.
Utilizing a NC4as_T4_v3 VM working with the default settings (xformers enabled)
Sampler: Euler a, CFG scale: 7, Size: 512x512, Model: v1-5-pruned-emaonly, python: 3.10.11, torch: 1.13.1+cu117, xformers: 0.0.16rc425we can achieve 6 - 7 iterations per second when generating images, but more on performance and benchmarking later.
Checking with Azure virtual machines pricing, for that kind of performance the cost would be ~150€/month for a virtual machine running 24x7 after applying 3Y RIs (and AHB in case of a Windows VM)
However, in case you don’t need your Stable Diffusion instance available 24x7, Savings Plan for Compute might prove to be a cheaper option, costing ~0.25€/hour after applying 3Y Savings Plan (and AHB in case of a Windows VM).
Due to huge demand for GPU virtual machines there’s a high chance you might face one of the following issues:
Size not available: This size is currently unavailable in “your_region” for this subscription: NotAvailableForSubscription.
Insufficient quota: 4 vCPUs are needed for this configuration, but only 0 vCPUs (of 4) remain for the Standard NCASv3_T4 Family vCPUs.
For both cases, head over to Quotas on your Azure Portal, select your region, filter for T4 and file a support request
In case you face any issues with the process above, check Increase VM-family vCPU quotas and Azure region access request process
Creating VM and installing prerequisites
Finally, the interesting part! Head over to your Azure portal and create a new VM. Make sure you select NC4as_T4_v3 and Windows 11 Enterprise, version 22H2 - x64 Gen2
The only reason to prefer Windows over Linux is the option to use the VM with several Windows based GUI desktop applications for GPU-accelerated graphics and visualization applications based on DirectX. The same guide with minor adjustments (downloading and installing Linux versions of prerequisites) can be used for a Linux VM with the same functionality.
Consider adding a second disk where you will install Stable Diffusion and download additional models. Storage space requirements and load times will increase over time.
After your VM is provisioned, connect using Remote Desktop, download and install
Latest Python Stable Release for Windows from Python downloads. As of 17/04/2023 the latest stable release was Python 3.10.11 - April 5, 2023. This is the version used and tested to work with this guide.
Latest Git for Windows from git-scm downloads.
Latest NVIDIA GPU GRID driver from Microsoft. Driver version tested with this guide is GRID 15.2 for Windows 11 22H2/21H2, Windows 10 22H2, Server 2019/2022
As explained at Supported operating systems and drivers and at NVIDIA GRID drivers
You could use a CUDA driver from NVIDIA Driver downloads. The latest WHQL version (528.89 released on 30/03/2023 for Windows 10/11 64-bit) was tested and found to work with Stable Diffusion.
However, according to my tests, and aligned with Microsoft’s guidance above, some desktop (GUI ) applications did behaved as expected with CUDA driver, regarding 3D acceleration.
Installing AUTOMATIC1111 Stable Diffusion web UI
Open a Terminal window, change to the Drive / Folder you want to install Stable Diffusion and run
git clone https://github.com/AUTOMATIC1111/stable-diffusion-webui.git
webui-user.bat
Let the script run, it will take some time to download and install all required software, once it finishes it will start the web UI on localhost.
By enabling xformers (adding --xformers to commandline args) major speed increases are observed for select cards. In our case the increase was greater than 25%, going from ~5.05it/s to ~6.45 it/s. To start with xformers enabled, stop the script, and modify set COMMANDLINE_ARGS of webui-user.bat
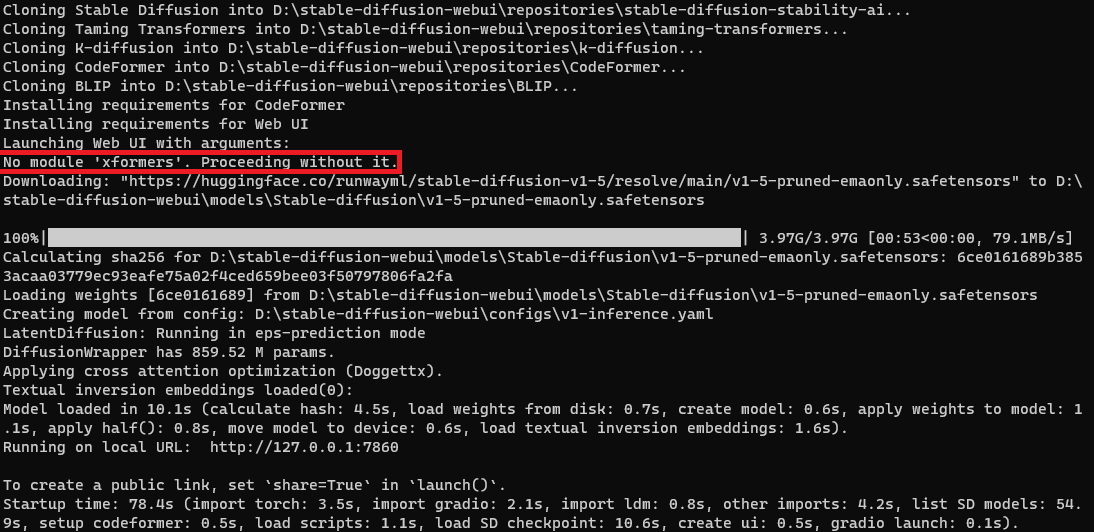
Run again webui-user.bat to start the web UI and look for
If you face any issues with installing xformers, retry with
set COMMANDLINE_ARGS=--reinstall-xformers --xformersand once you manage to start with xformers enabled, remove --reinstall-xformers from webui-user.bat after upgrading or you'll reinstall xformers perpetually. In case of any issues, have a look at
Hopefully, you will end up with something like
and you should have your web UI running on localhost. Open the web browser of your VM and head over to http://127.0.0.1:7860 to access your own Stable Diffusion web UI. Write a prompt and watch creating a beautiful image. Leaving defaults, it takes about 3 seconds for 512x512 images using 20 steps consuming about 4GB of VRAM.
Benchmarks
Now we have our Stable Diffusion deployment and web UI up and running, time to test the performance. There are various benchmark numbers circulating across several web sites, picking one to compare with might prove challenging. One of the oldest, most popular, and most reliable web sites on hardware and benchmarking, Tom’s Hardware, has very recently run some tests.
The full article can be found at Stable Diffusion Benchmarked: Which GPU Runs AI Fastest (Updated) Trying to be as close as possible to benchmarking conditions, we used the same settings and the same prompt. Hence:
Build: Automatic1111
Resolution: 512x512
Positive Prompt: postapocalyptic steampunk city, exploration, cinematic, realistic, hyper detailed, photorealistic maximum detail, volumetric light, (((focus))), wide-angle, (((brightly lit))), (((vegetation))), lightning, vines, destruction, devastation, wartorn, ruins
Negative Prompt: (((blurry))), ((foggy)), (((dark))), ((monochrome)), sun, (((depth of field)))
Steps: 100
Classifier Free Guidance: 15.0
Sampling Algorithm: Euler variant (Ancestral on Automatic 1111)
After hitting generate, Stable Diffusion starts working and the output we have on command prompt is a text-based progress bar. Once generation completes, the number of iterations per second is noted. After running the generation for twenty times this is the output on command prompt.
Using the NC4as_T4_v3 virtual machine, Stable Diffusion achieves a performance of 6.794 iterations per second. For comparison, and according to Tom’s Hardware numbers, its’s on par with NVIDIA RTX 3060 and NVIDIA RTX 2060 performance.
Conclusion
Having a Stable Diffusion installation up and running is just the first step. From here on the interesting part begins and the possibilities are truly endless. Our deployment is utilizing runwayml/stable-diffusion-v1-5 model, but there is a vast number of ready to use models, optimized and finetuned to achieve specific aesthetics, styles, or just focused on solving issues with generic models. Hundreds of models are available on Models - Hugging Face and countless online on various generative AI art community fan sites.
For a quick intro, Beginer’s guide to Stable Diffusion AI image does a fairly good job providing all the essential information on:
How to start with generating images
The kind of images & styles of Stable Diffusion
References to AUTOMATIC’s advanced web UI
How to build a good prompt
What is image-to-image
Common ways to fix defects in images
Custom models
How to train a new model
Negative prompts
Controlling image composition
Advanced topics are covered with detailed guides on the same site, and there’s already more information available online than we can consume!
Utilizing the deployment to add new models, explore some of the functions of the web UI, and work with command line flags to introduce additional functionality (i.e. create a xxx.app.gradio public link protected with username and password to access web UI from public Internet) are some of the next steps.
Maybe worth revisiting the topic, with a new post, on some of the above. Until then as a sample, a background for Teams :)


